
WebAssembly (Wasm) is revolutionizing how we write performant, portable web applications—and Rust is one of the best languages to harness its power. Whether you’re building a web app, a game, or a performance-critical module, Rust + WebAssembly is a compelling combination. But how do you get started?
Introduction
Rust and WebAssembly form a powerful duo for modern web development. WebAssembly allows you to compile code written in languages like Rust to run on the web at near-native speed. This opens the door to building blazing-fast web apps, porting existing logic to the browser, or simply escaping some of JavaScript’s limitations.
In this post, we’ll walk you through everything you need to know to get started with Rust and WebAssembly. You’ll learn how to set up your environment, write your first Wasm-compiled Rust code, and understand the tooling and ecosystem surrounding this workflow. Whether you’re a Rustacean curious about web development or a frontend developer looking to supercharge your web apps, this guide is your launchpad.
What is WebAssembly (Wasm)?
WebAssembly (Wasm) is changing how we build for the web. Traditionally, the browser has been JavaScript’s domain. But now, Wasm allows us to run compiled code—written in languages like Rust—directly in the browser with near-native performance.
It’s fast, secure, and portable, opening the door to new possibilities in web development: game engines, 3D rendering, cryptography, data visualization, and more.
Rust is uniquely suited to take advantage of WebAssembly. With its emphasis on safety, performance, and zero-cost abstractions, it allows you to write Wasm code that’s compact, efficient, and secure—without worrying about memory safety bugs.
WebAssembly is not a programming language you write directly. Instead, it’s a low-level, binary instruction format designed to be a portable compilation target for high-level languages like Rust, C, and C++.
You write code in a language like Rust, compile it into Wasm, and then run that Wasm module inside a secure sandboxed environment—typically in a browser, but also on servers and edge runtimes.
Wasm is:
- Binary and compact: Small file sizes and fast load times
- Safe and secure: Executes in a sandbox with no direct access to system resources
- Fast: Near-native execution speed
- Portable: Works the same across operating systems and browsers
- Language-agnostic: Any language that can compile to Wasm can run in a Wasm runtime
Unlike JavaScript, which is interpreted or just-in-time compiled, WebAssembly code is precompiled to efficient machine code, giving you greater control and performance.
The History of Browser Support for Wasm
Modern browsers now understand and support WebAssembly (Wasm) — and it’s native support, not a plugin or extension.
WebAssembly was first announced in 2015 as a joint effort between browser vendors, and all major browsers added native support in 2017:
| Browser | First Version with Wasm Support | Release Date |
|---|---|---|
| Chrome | 57 | March 2017 |
| Firefox | 52 | March 2017 |
| Safari | 11 | September 2017 |
| Edge (Legacy) | 16 | October 2017 |
So as of 2017, every modern browser has been able to load .wasm files directly using JavaScript APIs like:
WebAssembly.instantiateStreaming(...)or via modules generated by tools like wasm-pack, which compile Rust to .wasm and expose friendly JavaScript bindings.
But How Does That Work — If Browsers Only “Understand” HTML/CSS/JS?
That’s the key:
- Browsers don’t render or interpret Wasm like HTML or JS
- Instead, they treat it as a binary module you load through JavaScript
- The browser has a built-in virtual machine for Wasm — just like it has one for JavaScript
So Wasm isn’t a replacement for JS — it’s a companion that you load, instantiate, and call from JavaScript. Think of it like a shared library (.dll or .so) but running inside a browser’s sandbox.
Quick Analogy
Imagine you’re still writing your frontend in HTML/JS — but now you can say:
“Hey browser, here’s this really fast binary module. Run this part of my logic with it.”
That binary module? That’s your .wasm.
- Yes, browsers now understand WebAssembly — through native support added around 2017
- No, they don’t replace HTML/CSS/JS — but complement them
- You load
.wasmthrough JavaScript - Every modern browser today supports it natively, no plugins required
Prerequisites for the Examples
Let’s install various software used as we go through the exercises in this post. These are global installations, so you don’t need to be in a particular directory, just open a shell window.
Note: for the examples in this post we’ll be using the Chrome browser.
Install Rust (via rustup)
On macOS or Linux, run:
curl --proto '=https' --tlsv1.2 -sSf https://sh.rustup.rs | shOn Windows, download the installer from https://rustup.rs
After installation run this to verify the install:
rustc --version

You should see something like this (your version might be newer):

rustc 1.86.0 (05f9846f8 2025-03-31)
Install Node.js and npm (https://nodejs.org)
npm comes with Node.js. After installing Node.js, verify it by running:
node -v
You should see something like this v18.13.0
but your version might be newer.

npm -v
You should see something like this 8.19.3
but your version might be newer.
Install a Static File Server (we’ll use serve)
npm install -g serveAdd Support for Rust to Compile to wasm
rustup target add wasm32-unknown-unknownYou only need to do this once per machine.
This command tells rustup (Rust’s toolchain manager) to download and install support for compiling Rust code to a specific target platform: wasm32-unknown-unknown.
More specifically:
- It adds the WebAssembly target to your local Rust toolchain.
- This allows you to compile Rust code into
.wasmfiles usingcargo build --target=wasm32-unknown-unknown.
| Part | Meaning |
|---|---|
wasm32 | The architecture: 32-bit WebAssembly |
unknown | The vendor: unspecified (generic) |
unknown | The operating system: unspecified (no OS) |
So:
- This target doesn’t assume any specific operating system (like Linux or Windows),
- and doesn’t assume a specific runtime (like WASI or Emscripten).
- It’s essentially the “rawest” form of Wasm—just enough for the browser or a host runtime like Wasmtime to run it.
You can verify the WebAssembly target was added by executing this:
rustup target list --installedIf you see this you’re good to go:
wasm32-unknown-unknownInstall wasm-pack (builds Rust to Wasm and creates JS bindings)
cargo install wasm-packwasm-pack is a high-level tool that:
- Compiles Rust to WebAssembly
- Uses
wasm-bindgento generate JS/TS bindings - Creates a proper
package.json - Outputs files ready to be published to npm or used in a JS/TS app
wasm-pack uses rustup target add wasm32-unknown-unknown under the hood,
First Taste of Rust and WebAssembly
Let’s look at several examples demonstrating what WebAssembly is and how to use it with Rust.
Open a shell window (Terminal on Mac/Linux, CMD or PowerShell on Windows). Then navigate to the directory where you store Rust packages for this blog series.
A Basic Rust Function Compiled to Wasm That Adds Two Numbers
We’ll go through this first example and look at what was generated and how it all works together to run Rust in the browser.
This first example involves JavaScript calling a Rust function that adds two numbers. Then JavaScript displays the result in a web page.
Create the Rust project
cargo new --lib wasm_add_numbersCD into the wasm_add_numbers directory, and open that directory in VS Code (or your favorite IDE). Note: Using VS Code is highly recommended for following along with this blog series. Be sure to install the Rust Analyzer extension — it offers powerful features like code completion, inline type hints, and quick fixes.
Also, make sure you’re opening the wasm_add_numbers directory itself in VS Code. If you open a parent folder instead, the Rust Analyzer extension might not work properly — or at all.
After creating the project you have a project structure like this:
wasm_add_numbers/
├── Cargo.toml
└── src
    └── lib.rs
Edit file Cargo.toml to have the following contents:
[package]name = "wasm_add_numbers"
version = "0.1.0"
edition = "2024"

[lib]
crate-type = ["cdylib"]

[dependencies]
wasm-bindgen = "0.2"
crate-type = ["cdylib"]
This line tells cargo:
“When building this crate as a library, compile it as a C-compatible dynamic library.”
wasm-bindgen is a Rust library and tool that generates JavaScript bindings for Rust functions compiled to WebAssembly. It lets you:
- Call Rust functions from JavaScript
- Call JavaScript APIs (like
window,console, or DOM) from Rust - Exchange data (strings, numbers, arrays, etc.) between Rust and JS
It bridges the gap between Rust and JavaScript/WebAssembly environments, making interop seamless.
Edit file src/lib.rs to have the following contents (our Rust function to add two numbers):
use wasm_bindgen::prelude::*;

#[wasm_bindgen]
pub fn add(a: i32, b: i32) -> i32 {
    a + b
}
use wasm_bindgen::prelude::*;
This line brings commonly used items from the wasm-bindgen crate into scope — specifically those needed to interface Rust with JavaScript.
#[wasm_bindgen] attribute
This attribute is what makes your Rust function accessible from JavaScript after it’s compiled to WebAssembly.
- Tells
wasm-bindgento export the function to the generated.wasm+ JS wrapper. - Generates the JS glue code needed to call this function from JS.
- Ensures correct type conversion (e.g., Rust
i32→ JSnumber).
Without #[wasm_bindgen]:
The add function would exist inside the .wasm binary, but it wouldn’t be exported in a way JavaScript could call it.
Build the Wasm Module
wasm-pack build --target webThis runs the wasm-pack tool we installed earlier.
This command:
- Builds your Rust crate into a WebAssembly package
- Generates the necessary JavaScript bindings using
wasm-bindgen - Creates a
pkg/folder containing:
You typically get these three key types of files in the pkg/ directory:
| File Type | Description |
|---|---|
.wasm | Compiled WebAssembly binary from your Rust code. This is what runs in the browser or Node. |
.js | JavaScript glue code generated by wasm-bindgen to load and call your Rust functions from JS. |
.d.ts | TypeScript declaration files for type definitions for your exported Rust functions |
The --target web flag specifies the JavaScript environment.
Now your project structure should be similar to this:
wasm_add_numbers/
├── Cargo.toml
├── src/
│   └── lib.rs
├── pkg/
│   ├── wasm_add_numbers.js        # JS glue code to load and interact with the WASM module
│   ├── wasm_add_numbers_bg.wasm   # Compiled WebAssembly binary (the core logic)
│   ├── wasm_add_numbers_bg.js     # Additional JS glue for internal wasm memory/interop
│   ├── wasm_add_numbers.d.ts      # TypeScript definitions (optional, for TS users)
│   ├── package.json               # Generated package manifest for npm publishing
│   └── README.md                  # Auto-generated usage instructions
Create the Web Interface
In the root wasm_add_numbers directory (same level as pkg/ and src/ directories), create an index.html file with the following contents:
<!DOCTYPE html>
<html>
    <head><meta charset="utf-8"><title>Wasm Add Two Numbers</title></head>
    <body>
        <h1>Rust + Wasm to Add Two Numbers</h1>
        <pre id="output"></pre>
        <script type="module" src="index.js"></script>
    </body>
</html>
In the root wasm_add_numbers directory (same level as pkg/ and src/ directories), create an index.js file with the following contents:
import init, { add } from "./pkg/wasm_add_numbers.js";

async function run() {
  await init();
  const result = add(5, 7);
  document.getElementById("output").textContent = `5 + 7 = ${result}`;
}

run();
Our HTML file simply displays a large header with the text: “Rust + Wasm to Add Two Numbers“ . It also has a <pre> element we’ll access in the JavaScript file. And it has a <script> element referencing our index.js JavaScript file.
Our JavaScript file imports some things from wasm_add.js which was generated by the wasm-pack tool. Then we define an async (asynchronous) function run().
The run() function waits for the call to init() to finish, then calls the add() function, passing in numbers 5 and 7, assigning the result to a constant result.
Then the result constant is used to set the text of the <pre> element in the HTML file.
Finally, the run() function is called.
When our html file is loaded in the browser, the <script> tag gets loaded, causing the index.js file to be executed. The functions are called, the numbers are added, and the result is displayed in the HTML page.
Next, let’s start our web server and then load the HTML file in the browser.
Serve and Run in the Browser
Start a local web server
npx serve .You should see something like this:

In a new browser tab, open the printed URL: http://localhost:3000
You should see something like this:

What Files are Delivered to the Browser?
When a user opens your page in the browser, only certain files are delivered over the network:
- ✅
index.html— the structure of your page - ✅
index.js— the logic that loads and uses the WebAssembly - ✅ Files inside
pkg/:wasm_add_numbers.js— JS that imports and wraps the WASM modulewasm_add_numbers_bg.wasm— the actual compiled Rust codewasm_add_numbers_bg.js— additional glue code (e.g., memory handling)
⚠️ Your original Rust source code (src/) and Cargo.toml are never sent to the browser. They stay on your development machine or server and are used only at build time.
A Console Log from Rust to the Browser
Our second example will add functionality to the project from the previous example, to log a message to the browser dev tools Console.
Ensure the Cargo.toml file has these contents.
[package]
name = "wasm_hello"
version = "0.1.0"
edition = "2021"

[lib]
crate-type = ["cdylib"]

[dependencies]
wasm-bindgen = "0.2"

[dependencies.web-sys]
version = "0.3"
features = ["console"]
This new section we added:
[dependencies.web-sys]Pulls in the web-sys crate
- Enables the
consolebindings for logging - Doesn’t bloat your binary with other browser APIs (only includes what you need)
- Allows you to log from Rust to the browser’s dev tools console
Update file src/lib.rs to have this content:
use wasm_bindgen::prelude::*;
use web_sys::console;

#[wasm_bindgen(start)]
pub fn run_on_startup() {
    console::log_1(&"Hello from Rust and WebAssembly!".into());
}
#[wasm_bindgen(start)]
- This marks the function
run_on_startup()to run automatically when the Wasm module loads (like a constructor). - It’s the perfect place to put setup logic like logging, initializing DOM state, timers, etc.
- The
console::log_1(...)call will immediately log when the Wasm module finishes loading viaawait init()in JS.
You can name the function whatever, init(), initialize(), here we’ve named it run_on_startup().
- The
1inlog_1means “this version oflogaccepts 1 argument.” - Rust doesn’t have variadic functions, so
web-sysoffers multiple fixed-aritylog_*methods. - You can use
log_2,log_3, etc., to log multiple values like in JavaScript.
Build the Wasm Module
Stop the currently running web server with Ctrl + c.
Then rebuild the wasm module with the wasm-pack build command:
wasm-pack build --target webServe and Run in the Browser
Start a local web server
npx serve .Open the Chrome developer tools using one of these methods:
- F12
- View – Developer – Developer Tools (from the Chrome menu bar)
Refresh the browser tab: http://localhost:3000
You should see the same content as before in the browser, but the Console should now display this message on refresh:
Hello from Rust and WebAssembly!
If the Console displays an error regarding /favicon.ico you can ignore it.
Now you know how to run Rust code in the browser, and how to display the results in a web page!
You also know how to display messages in the Developer Tools Console, which can be very useful for debugging.
Passing Strings Between Rust and WebAssembly
Let’s look at an example of passing String data.
Passing Data From JS to Rust, and Returning Data from Rust to JS
In this example we’ll create a new project. Our Rust code will have a function that accepts a string slice, a person’s name, and returns a String with a message using the person’s name in a greeting.
Our JavaScript code will call our Rust function, passing a name, and will use the returned greeting message to set some text in a web page.
Create the Rust project
Stop the currently running server with Ctrl + c. Then CD up one directory to the directory where you keep Rust projects for ByteMagma blog posts (or any directory you wish).
cargo new --lib wasm_greetingCD into the wasm_greeting directory, and open that directory in VS Code (or your favorite IDE). Note: Using VS Code is highly recommended for following along with this blog series. Be sure to install the Rust Analyzer extension — it offers powerful features like code completion, inline type hints, and quick fixes.
Also, make sure you’re opening the wasm_greeting directory itself in VS Code. If you open a parent folder instead, the Rust Analyzer extension might not work properly — or at all.
After creating the project you have a project structure like this:
wasm_greeting/
├── Cargo.toml
└── src
    └── lib.rs
Edit file Cargo.toml to have the following contents:
[package]
name = "wasm_greeting"
version = "0.1.0"
edition = "2024"

[lib]
crate-type = ["cdylib"]

[dependencies]
wasm-bindgen = "0.2"
Edit file src/lib.rs to have the following contents (our Rust function to take a name and return a message):
use wasm_bindgen::prelude::*;

#[wasm_bindgen]
pub fn greet(name: &str) -> String {
    format!("Hello, {}!", name)
}
This is our Rust function that takes a string slice parameter and returns a String created using the parameter and the format!() macro.
Build the Wasm Module
wasm-pack build --target webCreate the Web Interface
In the root wasm_greetingpkg/ and src/ directories), create an index.html file with the following contents:
<!DOCTYPE html>
<html>
    <head><meta charset="utf-8"><title>Rust Wasm Greeting</title></head>
    <body>
        <h1>Rust + WebAssembly</h1>
        <pre id="output">Loading...</pre>
        <script type="module" src="index.js"></script>
    </body>
</html>
In the root wasm_greetingpkg/ and src/ directories), create an index.js file with the following contents:
import init, { greet } from "./pkg/wasm_greeting.js";

async function run() {
  await init();
  document.getElementById("output").textContent = greet("Richard");
}

run();
Our JavaScript has a run() function that calls our Rust greet() function, passing the string slice “Richard”. The return value from the Rust function is immediately used to set the text of our <pre> element in our HTML page.
Serve and Run in the Browser
Start a local web server
npx serve .You should see the output in the shell window indicating the server has started.
In a new browser tab, open the printed URL: http://localhost:3000, or simply refresh the browser tab we used for the first two examples.
You should see something like this:

A Low-Level Rust / Web Assembly Example
Now that we’ve seen how to use Rust and WebAssembly with JavaScript bindings and tooling like wasm-pack, let’s take a look under the hood. In this example, we skip all helpers and compile straight to .wasm, then load it with native browser APIs — no glue code, no bindings, just raw performance.
Pure Rust to .wasm: A Low-Level WebAssembly Example
Create the Rust project
Stop the currently running server with Ctrl + c. Then CD up one directory to the directory where you keep Rust projects for ByteMagma blog posts (or any directory you wish).
Create a directory named direct_rust_to_wasm. We’re not using cargo to create a new Rust project.
CD into the direct_rust_to_wasm directory, and open that directory in VS Code.
Create file main.rs in that direct_rust_to_wasmmain.rs:
#![no_std]
#![no_main]

#[no_mangle]
pub extern "C" fn square(x: i32) -> i32 {
    x * x
}

// Required panic handler
use core::panic::PanicInfo;
#[panic_handler]
fn panic(_info: &PanicInfo) -> ! {
    loop {}
}

// Required by some targets when unwinding is disabled
#[no_mangle]
pub extern "C" fn __eh_personality() {}
Let’s see what’s going on in this code.
#![no_std]
#![no_main]
#![no_std] — No Standard Library
This tells the Rust compiler not to link the standard library (std), which is normally included by default in every Rust project.
Why it’s needed in this example:
- The Rust standard library requires an OS and system-level features like threads, files, and I/O.
- WebAssembly (especially
wasm32-unknown-unknown) doesn’t provide those features. - Instead, we rely on the much smaller
corelibrary, which provides essentials like math, formatting, and traits — but no heap allocation, file I/O, or OS access.
Consequences:
- We must handle things like panics and entry points manually.
- We cannot use types like
String,Vec, or anything that depends onstd.
#![no_main] — No Default Entry Point
This tells Rust not to expect a fn main() as the program’s entry point.
Why it’s needed in this example:
- We’ll be exporting a function
square(), not writing a traditional executable. - We’ll be defining the entry point externally (e.g., in JS or via WebAssembly exports).
- We don’t want Rust to inject its default runtime or setup logic (which
main()would trigger).
Why These Two Are Common Together
They’re usually paired in bare-metal, embedded, or ultra-minimal environments (like Wasm, kernels, or microcontrollers), where:
- There’s no operating system
- You don’t need or can’t use the full Rust runtime
- You control what gets compiled and exposed — like just one
#[no_mangle] pub extern "C"function
#[no_mangle]
pub extern "C" fn square(x: i32) -> i32 {
    x * x
}
#[no_mangle] – don’t change the function name
Prevents the Rust compiler from “mangling” the function name.
What’s name mangling?
Rust (like C++, Swift, etc.) typically transforms function names internally into long, unique symbols during compilation — to support things like overloading and namespaces.
So this:
fn square(x: i32) -> i32might compile to:
_ZN13wasm_example6square17h123456789abcdefEWebAssembly (and C/JS/etc.) can only call functions with exact, known names — so #[no_mangle] keeps the function name exactly square, making it callable from JavaScript like this:
instance.exports.square(7);The reason we didn’t use #[no_mangle] in earlier exercises is because we were using wasm-bindgen, which handles name mangling and exports for us automatically.
pub extern "C"
extern "C" tells Rust:
“Use the C calling convention for this function.”
Why use the C calling convention?
- It defines how parameters are passed, how the stack is managed, etc.
- It’s the standard ABI (Application Binary Interface) for WebAssembly and most FFI (foreign function interface) cases.
- It makes your function interoperable with C, JavaScript, and anything that can talk to a WebAssembly module.
pub makes the function exported:
- Without
pub, the function would be private to the Rust module. - With
pub extern "C", you’re making it public and externally callable via the Wasm module exports.
// Required panic handler
use core::panic::PanicInfo;
#[panic_handler]
fn panic(_info: &PanicInfo) -> ! {
    loop {}
}
Since we’re not using Rust’s standard library (#![no_std]), we must define what happens if a panic occurs. The Rust compiler requires a panic handler, even in minimal programs. In this example, we provide a simple, no-op handler that just loops forever — this satisfies the compiler, even if the panic never happens.
// Required by some targets when unwinding is disabled
#[no_mangle]
pub extern "C" fn __eh_personality() {}
When compiling Rust to WebAssembly without the standard library (#![no_std]), and especially when unwinding (stack-based error handling) is disabled, some targets still expect a function named __eh_personality.
This function is part of the compiler’s internal error-handling machinery — used for things like C++-style exception unwinding.
Even though we’re not using those features in WebAssembly, the compiler or linker may still expect this symbol to exist. So we provide a dummy definition to satisfy the build process.
Compile with rustc
rustc +stable --target=wasm32-unknown-unknown -O main.rs -o square.wasmThis should complete with no errors.
This command tells Rust to compile main.rs directly into a WebAssembly binary (.wasm) using the rustc compiler — no Cargo, no wasm-pack, and no glue code. It’s the lowest-level way to compile Rust to WebAssembly.
| Part | What it does |
|---|---|
rustc | Invokes Rust’s compiler directly |
+stable | Ensures you’re using the stable toolchain (optional if stable is default) |
--target=wasm32-unknown-unknown | Tells Rust to compile for 32-bit WebAssembly with no OS or vendor assumptions |
-O | Enables optimizations for smaller, faster code (-O is short for --opt-level=2) |
main.rs | The source file to compile |
-o square.wasm | Output file name — here, a compiled .wasm binary |
Your minimal project now has this structure:
direct_rust_to_wasm/├── main.rs         # Your Rust source file
└── square.wasm     # Compiled WebAssembly binary
Load the compiled .wasm module from JavaScript
Now that you’ve compiled main.rs into square.wasm, you can load that .wasm file from JavaScript using the WebAssembly.instantiate API.
This allows you to call your Rust function (square) from within the browser.
Create index.html in that direct_rust_to_wasm
<!DOCTYPE html>
<html>
<head><meta charset="utf-8"><title>Wasm Square</title></head>
<body>
  <h1>Square Result:</h1>
  <pre id="output"></pre>
  <script>
    fetch("square.wasm")
      .then(res => res.arrayBuffer())
      .then(bytes => WebAssembly.instantiate(bytes))
      .then(obj => {
        const result = obj.instance.exports.square(7);
        document.getElementById("output").textContent = `7 squared = ${result}`;
      });
  </script>
</body>
</html>
Let’s talk about what’s going on here:
fetch("square.wasm")
    .then(res => res.arrayBuffer())
    .then(bytes => WebAssembly.instantiate(bytes))
    .then(obj => {
        const result = obj.instance.exports.square(7);
        document.getElementById("output").textContent = `7 squared = ${result}`;
    });
In this example, we’re using the browser’s native WebAssembly API to load and execute a compiled .wasm file — no bundlers, no glue code, no wasm-bindgen. Just JavaScript and raw WebAssembly.
| Line | What It Does |
|---|---|
fetch("square.wasm") | Downloads the .wasm binary file from the server |
.then(res => res.arrayBuffer()) | Converts the fetched file into a raw binary buffer |
.then(bytes => WebAssembly.instantiate(bytes)) | Compiles and instantiates the WebAssembly module from the binary |
.then(obj => { ... }) | Once the module is ready, runs the logic inside the callback |
obj.instance.exports.square(7) | Calls the exported square function from the .wasm module with 7 as input |
document.getElementById(...).textContent = ... | Displays the result (49) in the browser page |
Serve and Run in the Browser
Start a local web server
npx serve .You should see the output in the shell window indicating the server has started.
In a new browser tab, open the printed URL: http://localhost:3000, or simply refresh the browser tab we used for the first two examples.
You should see something like this:

Exporting a Struct from Rust to JavaScript
You can export entire data structures using wasm-bindgen, not just functions. In this example that’s just what we do.
Exporting a Struct to JavaScript
Create the Rust project
Stop the currently running server with Ctrl + c. Then CD up one directory to the directory where you keep Rust projects for ByteMagma blog posts (or any directory you wish).
cargo new --lib wasm_export_structCD into the wasm_export_struct directory, and open that directory in VS Code (or your favorite IDE). Note: Using VS Code is highly recommended for following along with this blog series. Be sure to install the Rust Analyzer extension — it offers powerful features like code completion, inline type hints, and quick fixes.
Also, make sure you’re opening the wasm_export_struct directory itself in VS Code. If you open a parent folder instead, the Rust Analyzer extension might not work properly — or at all.
Edit file Cargo.toml to have the following contents:
[package]
name = "wasm_export_struct"
version = "0.1.0"
edition = "2024"

[lib]
crate-type = ["cdylib"]

[dependencies]
wasm-bindgen = "0.2"
Edit file src/lib.rs to have the following contents (our Rust struct and its methods and function):
use wasm_bindgen::prelude::*;

/// A counter struct with methods exposed to JavaScript.
#[wasm_bindgen]
pub struct Counter {
    value: i32,
}

#[wasm_bindgen]
impl Counter {
    #[wasm_bindgen(constructor)]
    pub fn new() -> Counter {
        Counter { value: 0 }
    }

    pub fn increment(&mut self) {
        self.value += 1;
    }

    pub fn get(&self) -> i32 {
        self.value
    }
}
We define a struct Counter and expose its methods to JavaScript. The methods include increment() to increase the struct value field by one, and a method to get the struct value field. We also have an associated function constructor that returns an instance of our Counter struct, with its value field initialized to zero.
Build the Wasm Module
wasm-pack build --target webCreate the Web Interface
In the root wasm_export_structpkg/ and src/ directories), create an index.html file with the following contents:
<!DOCTYPE html>
<html>
<head><meta charset="utf-8"><title>Wasm Export Rust Struct</title></head>
<body>
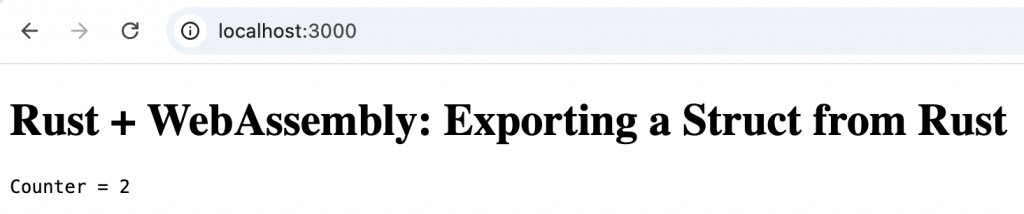
<h1>Rust + WebAssembly: Exporting a Struct from Rust</h1>
<pre id="output">Loading...</pre>
<script type="module" src="index.js"></script>
</body>
</html>In the root wasm_greeting directory (same level as pkg/ and src/ directories), create an index.js file with the following contents:
import init, { Counter } from "./pkg/wasm_export_struct.js";
async function run() {
  await init();
  const counter = new Counter();
  counter.increment();
  counter.increment();
  document.getElementById("output").textContent = `Counter = ${counter.get()}`;
}

run();
Our JavaScript run() function creates a new instance of our Counter struct using the Rust associated function constructor. We then call the increment() method twice, and then set the text of our <pre> element in the HTML file to the Counter instance value field.
The initial value of the Counter value field was zero, so now we expect it to have a value of two.
Serve and Run in the Browser
Start a local web server
npx serve .You should see the output in the shell window indicating the server has started.
In a new browser tab, open the printed URL: http://localhost:3000, or simply refresh the browser tab we used for the first two examples.
You should see something like this:

Calling JavaScript from Rust
Not only can you call Rust functions from within JavaScript, you can go the other way around and call JavaScript functions from Rust code.
Calling a JavaScript Function from Rust
This example shows how to import and call JavaScript functions from Rust using #[wasm_bindgen].
We’ll leverage our previous project in which we exported a struct from Rust.
Stop the currently running server with Ctrl + c.
Edit file src/lib.rs to add two functions (this is the complete lib.rs):
use wasm_bindgen::prelude::*;

/// A counter struct with methods exposed to JavaScript.
#[wasm_bindgen]
pub struct Counter {
    value: i32,
}

#[wasm_bindgen]
impl Counter {
    #[wasm_bindgen(constructor)]
    pub fn new() -> Counter {
        Counter { value: 0 }
    }

    pub fn increment(&mut self) {
        self.value += 1;
    }

    pub fn get(&self) -> i32 {
        self.value
    }
}

/// Import the `alert` function from JavaScript's global scope.
#[wasm_bindgen]
extern "C" {
    pub fn alert(s: &str);
}

#[wasm_bindgen]
pub fn notify(name: &str) {
    let message = format!("Hey, {}! This came from Rust.", name);
    alert(&message);
}
We import the alert() function that comes from JavaScript’s global scope. We also define a Rust function notify() that takes a name, creates a String using the format!() macro to create a message using the name, and then we call the JavaScript alert() function, passing it the message.
Build the Wasm Module
wasm-pack build --target webUpdate the JavaScript
We don’t need to change the index.html file, but we do need to add to our JavaScript file.
Edit the index.js file to also import the notify function from our Rust code, and to call it at the end of our run() function.
import init, { Counter, notify } from "./pkg/wasm_export_struct.js";

async function run() {
  await init();
  const counter = new Counter();
  counter.increment();
  counter.increment();
  document.getElementById("output").textContent = `Counter = ${counter.get()}`;
  notify("Susan");
}

run();
Serve and Run in the Browser
Start a local web server
npx serve .You should see the output in the shell window indicating the server has started.
In a new browser tab, open the printed URL: http://localhost:3000, or simply refresh the browser tab we used for the first two examples.
On loading the page in the browser, you should see an alert dialog popup with the message:
“Hey, Susan! This came from Rust.”
After you click the OK button, you should see something like this:
Passing More Complex Data
Passing more complex types between Rust and WebAssembly like arrays, vectors, etc. requires special handling due to differences in memory models and data representation.
Because Rust and JavaScript use different memory models, this kind of data exchange isn’t automatic — it requires careful handling and the help of wasm-bindgen.
We’ll see several examples of passing compound types such as Rust vectors and objects that map well to JavaScript arrays or class-like behavior. You’ll see how wasm-bindgen handles these conversions and what kinds of types can cross the boundary safely and cleanly.
Passing an Array from JavaScript to Rust
This example demonstrates how to accept a JS Uint8Array in Rust and return its sum.
Create the Rust project
Stop the currently running server with Ctrl + c. Then CD up one directory to the directory where you keep Rust projects for ByteMagma blog posts (or any directory you wish).
cargo new --lib wasm_pass_arrayCD into the wasm_pass_array directory, and open that directory in VS Code (or your favorite IDE). Note: Using VS Code is highly recommended for following along with this blog series. Be sure to install the Rust Analyzer extension — it offers powerful features like code completion, inline type hints, and quick fixes.
Also, make sure you’re opening the wasm_pass_array directory itself in VS Code. If you open a parent folder instead, the Rust Analyzer extension might not work properly — or at all.
Edit file Cargo.toml to have the following contents:
[package]
name = "wasm_pass_array"
version = "0.1.0"
edition = "2024"

[lib]
crate-type = ["cdylib"]

[dependencies]
wasm-bindgen = "0.2"
Edit file src/lib.rs to have the following contents:
use wasm_bindgen::prelude::*;

/// Accepts a Uint8Array and returns the sum.
#[wasm_bindgen]
pub fn sum_array(arr: &[u8]) -> u32 {
    arr.iter().map(|&x| x as u32).sum()
}
We define a Rust function sum_array() that accepts a reference to an array of u8 data. The function iterates over the elements in the array, summing them. The function returns that sum.
Build the Wasm Module
wasm-pack build --target webCreate the Web Interface
Create an index.html file with the following contents:
<!DOCTYPE html>
<html>
    <head><meta charset="utf-8"><title>Wasm Passing an Array</title></head>
    <body>
        <h1>Rust + WebAssembly: Passing Array Data</h1>
        <pre id="output">Loading...</pre>
        <script type="module" src="index.js"></script>
    </body>
</html>
Create an index.js file with the following contents:
import init, { sum_array } from "./pkg/wasm_pass_array.js";

async function run() {
  await init();
  const data = new Uint8Array([10, 20, 30]);
  const result = sum_array(data);
  document.getElementById("output").textContent = `Sum = ${result}`;
}

run();
Our JavaScript run() function creates an array of numbers and then passes the array to our Rust function sum_array(). We then use the returned sum to set the text of our <pre> HTML element.
Serve and Run in the Browser
Start a local web server
npx serve .You should see the output in the shell window indicating the server has started.
In a new browser tab, open the printed URL: http://localhost:3000, or simply refresh the browser tab we have used for earlier examples.
You should see something like this:

Returning an Array from Rust to JavaScript
Returning arrays from Rust to JavaScript is trickier. You can use Vec<T> as return types, and wasm-bindgen will handle the conversion to JS arrays.
We’ll build on our previous DOM example and extend it to read input fields.
Stop the currently running server with Ctrl + c.
Edit file src/lib.rs to add a function generate_sequence() – full file below:
use wasm_bindgen::prelude::*;

/// Returns a Vec<i32> that gets turned into a JS array.
#[wasm_bindgen]
pub fn generate_sequence(n: i32) -> Vec<i32> {
    (0..n).collect()
}
Edit file index.html:
<!DOCTYPE html>
<html>
    <head><meta charset="utf-8"><title>Wasm Passing an Array</title></head>
    <body>
        <h1>Rust + WebAssembly: Passing Array Data</h1>
        <pre id="output">Loading...</pre>
        <pre id="output_two">Loading...</pre>
        <script type="module" src="index.js"></script>
    </body>
</html>
We add a second <pre> element to display the array returned from Rust to JavaScript.
Edit file index.js:
import init, { sum_array, generate_sequence } from "./pkg/wasm_pass_array.js";

async function run() {
  await init();
  const data = new Uint8Array([10, 20, 30]);
  const result = sum_array(data);
  document.getElementById("output").textContent = `Sum = ${result}`;

  const numbers = generate_sequence(5);
  document.getElementById("output_two").textContent = `Sequence: ${numbers.join(", ")}`;
}

run();
Build the Wasm Module
wasm-pack build --target webServe and Run in the Browser
Start a local web server
npx serve .You should see the output in the shell window indicating the server has started.
In a new browser tab, open the printed URL: http://localhost:3000, or simply refresh the browser tab we have used for earlier examples.
You should see something like this:

Understanding how data is marshaled between the languages is essential for real-world Rust + WebAssembly applications. Up next, we’ll explore how to handle errors and Result types safely between Rust and JavaScript.
Handling Errors and Result Types
In Rust, the idiomatic way to handle errors is through the Result<T, E> type. But what happens when Rust functions returning Result need to communicate with JavaScript, which doesn’t have a native Result type?
That’s where wasm-bindgen comes in: it can automatically convert Rust Result<T, E> values into JavaScript try/catch behavior. If your Rust function returns Ok, the JS call succeeds. If it returns Err, a JavaScript exception is thrown, which you can catch and handle on the JS side.
In this section, you’ll see how to expose error-producing functions from Rust and handle those errors cleanly in JavaScript.
Returning a Result from Rust and Catching It in JS
This example validates input in Rust and returns an error if it’s invalid.
Create the Rust project
Stop the currently running server with Ctrl + c. Then CD up one directory to the directory where you keep Rust projects for ByteMagma blog posts (or any directory you wish).
cargo new --lib wasm_result_demoCD into the wasm_result_demo
Also, make sure you’re opening the wasm_result_demo
Edit file Cargo.toml to have the following contents:
[package]
name = "wasm_result_demo"
version = "0.1.0"
edition = "2021"

[lib]
crate-type = ["cdylib"]

[dependencies]
wasm-bindgen = "0.2"
[dependencies.js-sys]
version = "0.3"
The js-sys crate provides Rust access to JavaScript’s core language-level features, like Math, Date, Array, Object, and Promise. In this case, Error::new() creates a throwable JavaScript error from Rust..
It acts as a bridge to the built-in JavaScript runtime objects, and is useful when you want to manipulate values, interact with JS types, or work with APIs that return JavaScript objects.
When writing Rust functions that return a Result<T, JsValue>, we can use js-sys::Error to create a JavaScript-native error object. This lets us signal errors that can be caught with try/catch in JavaScript — just like regular JS exceptions.
Edit file src/lib.rs to have the following contents:
use wasm_bindgen::prelude::*;
use js_sys::Error; // ✅ Import this to construct a real JS Error

/// Validates that a name is not empty.
#[wasm_bindgen]
pub fn validate_name(name: &str) -> Result<(), JsValue> {
    if name.trim().is_empty() {
        Err(Error::new("Name cannot be empty").into()) // ✅ Proper JS Error object
    } else {
        Ok(())
    }
}
We define a Rust function validate_name() that accepts a string slice for a name. If the name is empty after trimming whitespace, we return a JavaScript Error object using js_sys::Error. If the name is not empty we simply return a unit type () which acts as a flag that the name is valid.
Build the Wasm Module
wasm-pack build --target webCreate the Web Interface
Create an index.html file with the following contents:
<!DOCTYPE html>
<html>
    <head><meta charset="utf-8"><title>Wasm Result</title></head>
    <body>
        <h1>Rust Error Handling</h1>
        <pre id="output">Loading...</pre>
        <script type="module" src="index.js"></script>
    </body>
</html>
Create an index.js file with the following contents:
import init, { validate_name } from "./pkg/wasm_result_demo.js";

async function run() {
  await init();

  try {
    validate_name(""); // This will throw
    document.getElementById("output").textContent = "Valid name!";
  } catch (err) {
    document.getElementById("output").textContent = `Error: ${err.message}`;
  }
}

run();
Our run() function tries to validate an empty string “” so an error should be thrown.
Serve and Run in the Browser
Start a local web server
npx serve .You should see the output in the shell window indicating the server has started.
In a new browser tab, open the printed URL: http://localhost:3000, or simply refresh the browser tab we have used for earlier examples.
You should see something like this:

Returning Result<T, E> with Useful Return Data
This example returns a String on success or throws a message on failure. We’ll make changes to the project for the previous example.
Stop the currently running server with Ctrl + c.
Edit file src/lib.rs to add a function double_input() – full file below:
use wasm_bindgen::prelude::*;
use js_sys::Error; // ✅ Import this to construct a real JS Error

/// Validates that a name is not empty.
#[wasm_bindgen]
pub fn validate_name(name: &str) -> Result<(), JsValue> {
    if name.trim().is_empty() {
        Err(Error::new("Name cannot be empty").into()) // ✅ Proper JS Error object
    } else {
        Ok(())
    }
}

/// Attempts to parse and double a number string.
#[wasm_bindgen]
pub fn double_input(input: &str) -> Result<String, JsValue> {
    let parsed: i32 = input.trim().parse()
        .map_err(|_| JsValue::from_str("Input must be a valid number"))?;
    Ok(format!("Double is {}", parsed * 2))
}
Edit file index.html:
<!DOCTYPE html>
<html>
    <head><meta charset="utf-8"><title>Wasm Result</title></head>
    <body>
        <h1>Rust Error Handling</h1>
        <pre id="output">Loading...</pre>
        <pre id="output_two">Loading...</pre>
        <script type="module" src="index.js"></script>
    </body>
</html>
We add a second <pre> element to display the message returned from Rust to JavaScript.
Edit file index.js – full file below:
import init, { validate_name, double_input } from "./pkg/wasm_result_demo.js";

async function run() {
  await init();

  try {
    validate_name(""); // This will throw
    document.getElementById("output").textContent = "Valid name!";
  } catch (err) {
    document.getElementById("output").textContent = `Error: ${err.message}`;
  }

  try {
    const result = double_input("21");
    document.getElementById("output").textContent = result;
  } catch (err) {
    document.getElementById("output").textContent = `Error: ${err.message}`;
  }
}

run();
Build the Wasm Module
wasm-pack build –target web
Serve and Run in the Browser
Start a local web server
npx serve .You should see the output in the shell window indicating the server has started.
In a new browser tab, open the printed URL: http://localhost:3000, or simply refresh the browser tab we have used for earlier examples.
You should see something like this:

In this subsection, you learned:
- How to return
Result<T, E>from Rust to JavaScript - How Rust errors are converted to JavaScript exceptions via
wasm-bindgen - How to catch those exceptions using
try/catchin JavaScript - How to return meaningful error messages or computed results from Rust
This is essential when building robust, production-quality apps that need graceful error handling across the Rust-JavaScript boundary.
More Practice Building Rust / WebAssembly Apps
Let’s build another WebAssembly-powered web app using Rust — one that interacts with the DOM, responds to user input, and performs logic directly from compiled Rust code.
This hands-on project will demonstrate how Rust can serve as a powerful, safe, and efficient core for interactive browser-based applications.
Creating a Counter App
This app uses Rust to manage the internal counter logic, and JavaScript to interact with the DOM.
Create the Rust project
Stop the currently running server with Ctrl + c. Then CD up one directory to the directory where you keep Rust projects for ByteMagma blog posts (or any directory you wish).
cargo new --lib wasm_counterCD into the wasm_counter
Also, make sure you’re opening the wasm_counter
Edit file Cargo.toml to have the following contents:
[package]
name = "wasm_counter"
version = "0.1.0"
edition = "2021"

[lib]
crate-type = ["cdylib"]

[dependencies]
wasm-bindgen = "0.2"
Edit file src/lib.rs to have the following contents:
use wasm_bindgen::prelude::*;

/// A counter struct with methods to update and read the value.
#[wasm_bindgen]
pub struct Counter {
    value: i32,
}

#[wasm_bindgen]
impl Counter {
    #[wasm_bindgen(constructor)]
    pub fn new() -> Counter {
        Counter { value: 0 }
    }

    pub fn increment(&mut self) {
        self.value += 1;
    }

    pub fn decrement(&mut self) {
        self.value -= 1;
    }

    pub fn get(&self) -> i32 {
        self.value
    }
}
We define a struct Counter with a value field, a constructor function, and several methods to increment, decrement, and get the value.
Build the Wasm Module
wasm-pack build --target webCreate the Web Interface
Create an index.html file with the following contents:
<!DOCTYPE html>
<html>
    <head><meta charset="utf-8"><title>Rust Counter App</title></head>
    <body>
        <h1>Counter App</h1>
        <p>Value: <span id="value">0</span></p>
        <button id="inc">Increment</button>
        <button id="dec">Decrement</button>

        <script type="module" src="index.js"></script>
    </body>
</html>
Create an index.js file with the following contents:
import init, { Counter } from "./pkg/wasm_counter.js";

async function run() {
  await init();
  const counter = new Counter();

  const valueEl = document.getElementById("value");
  document.getElementById("inc").onclick = () => {
    counter.increment();
    valueEl.textContent = counter.get();
  };

  document.getElementById("dec").onclick = () => {
    counter.decrement();
    valueEl.textContent = counter.get();
  };
}

run();
Our run() function creates a new instance of the Rust struct Counter. Then we set up event listeners for the buttons to increment and decrement, and when clicked we update the area of the HTML that displays the current value.
Serve and Run in the Browser
Start a local web server
npx serve .You should see the output in the shell window indicating the server has started.
In a new browser tab, open the printed URL: http://localhost:3000, or simply refresh the browser tab we have used for earlier examples.
Click the Increment and Decrement buttons and observe the displayed value being updated.
You should see something like this:

Creating a Calculator App
This app uses Rust to perform arithmetic on two input values and JavaScript to handle UI events.
We’ll use the previous counter project, adding to it for this example.
Stop the currently running server with Ctrl + c.
Edit file src/lib.rs to add function to add and subtract two numbers – full file below:
use wasm_bindgen::prelude::*;

/// A counter struct with methods to update and read the value.
#[wasm_bindgen]
pub struct Counter {
    value: i32,
}

#[wasm_bindgen]
impl Counter {
    #[wasm_bindgen(constructor)]
    pub fn new() -> Counter {
        Counter { value: 0 }
    }

    pub fn increment(&mut self) {
        self.value += 1;
    }

    pub fn decrement(&mut self) {
        self.value -= 1;
    }

    pub fn get(&self) -> i32 {
        self.value
    }
}

/// Adds two numbers.
#[wasm_bindgen]
pub fn add(x: i32, y: i32) -> i32 {
    x + y
}

/// Subtracts one number from another.
#[wasm_bindgen]
pub fn subtract(x: i32, y: i32) -> i32 {
    x - y
}
Edit file index.html – full file below:
<!DOCTYPE html>
<html>
    <head><meta charset="utf-8"><title>Rust Counter App</title></head>
    <body>
        <h1>Counter App</h1>
        <p>Value: <span id="value">0</span></p>
        <button id="inc">Increment</button>
        <button id="dec">Decrement</button>

        <h1>Calculator</h1>
        <input id="a" type="number" value="10">
        <input id="b" type="number" value="5">
        <button id="add">Add</button>
        <button id="sub">Subtract</button>
        <p id="result">Result: </p>

        <script type="module" src="index.js"></script>
    </body>
</html>
We add a new section to the HTML file for our calculator.
Edit file index.js – full file below:
import init, { Counter, add, subtract } from "./pkg/wasm_counter.js";

async function run() {
  await init();
  const counter = new Counter();

  const valueEl = document.getElementById("value");
  document.getElementById("inc").onclick = () => {
    counter.increment();
    valueEl.textContent = counter.get();
  };

  document.getElementById("dec").onclick = () => {
    counter.decrement();
    valueEl.textContent = counter.get();
  };

  const aEl = document.getElementById("a");
  const bEl = document.getElementById("b");
  const resultEl = document.getElementById("result");

  document.getElementById("add").onclick = () => {
    const result = add(parseInt(aEl.value), parseInt(bEl.value));
    resultEl.textContent = `Result: ${result}`;
  };

  document.getElementById("sub").onclick = () => {
    const result = subtract(parseInt(aEl.value), parseInt(bEl.value));
    resultEl.textContent = `Result: ${result}`;
  };
}

run();
We add code to handle click events on the Add and Subtract buttons, and to update the displayed result.
Build the Wasm Module
wasm-pack build --target webServe and Run in the Browser
Start a local web server
npx serve .You should see the output in the shell window indicating the server has started.
In a new browser tab, open the printed URL: http://localhost:3000, or simply refresh the browser tab we have used for earlier examples.
Click the Add and Subtract buttons and observe the result is updated. You can also change the numbers in the input text boxes, click the buttons and see a new result.
You should see something like this:

Summary
You now have a complete WebAssembly app powered by Rust:
- A counter that maintains state in Rust and updates the DOM
- A calculator that performs arithmetic using Rust functions
These examples show how to combine Rust’s logic with JavaScript’s UI control to create meaningful browser apps.
Connecting to the DOM from Rust
So far, you’ve used JavaScript to interact with the DOM while Rust handled logic. But what if Rust could manipulate the browser directly? Thanks to the web-sys crate, you can do just that. web-sys exposes Rust bindings to the entire browser Web API — including the DOM.
In this subsection, you’ll learn how to access HTML elements, change their contents, and respond to DOM events from Rust, without writing JavaScript. While the syntax is more verbose than JavaScript, the benefit is full type safety and unified logic in your Rust code.
Changing Text in the DOM from Rust
This example grabs a DOM element and sets its text content when the page loads.
Create the Rust project
Stop the currently running server with Ctrl + c. Then CD up one directory to the directory where you keep Rust projects for ByteMagma blog posts (or any directory you wish).
cargo new --lib wasm_domCD into the wasm_dom
Also, make sure you’re opening the wasm_dom
Edit file Cargo.toml to have the following contents:
[package]
name = "wasm_dom"
version = "0.1.0"
edition = "2021"

[lib]
crate-type = ["cdylib"]

[dependencies]
wasm-bindgen = "0.2"

[dependencies.web-sys]
version = "0.3"
features = ["Document", "Window", "Element"]
The web-sys crate gives Rust access to browser APIs — like the DOM, console, and events — by providing bindings to JavaScript’s window, document, and related interfaces.
It’s modular by design: you only enable the APIs you need, using feature flags. This keeps your final .wasm binary smaller and faster.
| Feature | Enables access to… | Similar to in JavaScript |
|---|---|---|
"Window" | The window global object | window.alert(), window.location |
"Document" | The DOM document object | document.getElementById() |
"Element" | The generic DOM element interface | Used for manipulating tags (<div>, <p>, etc.) |
Edit file src/lib.rs to have the following contents:
use wasm_bindgen::prelude::*;
use web_sys::{window, Document};

#[wasm_bindgen(start)]
pub fn run() -> Result<(), JsValue> {
    let window = window().expect("no global `window` exists");
    let document: Document = window.document().expect("should have a document");

    let element = document
        .get_element_by_id("output")
        .expect("should have #output on the page");

    element.set_inner_html("Hello from Rust!");

    Ok(())
}
We grab the global window object and its document object. Then we use document functions to get a specific element in the HTML, and then set the element text. We do all this all within Rust.
Build the Wasm Module
wasm-pack build --target webCreate the Web Interface
Create an index.html file with the following contents:
<!DOCTYPE html>
<html>
    <head><meta charset="utf-8"><title>DOM from Rust</title></head>
    <body>
        <h1>Connecting Rust to the DOM</h1>
        <p id="output">Loading...</p>
        <script type="module" src="index.js"></script>
    </body>
</html>
Create an index.js file with the following contents:
import init from "./pkg/wasm_dom.js";

init(); // Rust will manipulate the DOM on load
This is a minimal JavaScript file with no logic to our application task.
Serve and Run in the Browser
Start a local web server
npx serve .You should see the output in the shell window indicating the server has started.
In a new browser tab, open the printed URL: http://localhost:3000, or simply refresh the browser tab we have used for earlier examples.
You should see something like this:

Reading Input and Updating Output in Rust
This example reads a value from an input element and updates another DOM element based on that value.
We’ll use the previous project in which we passed an array from JavaScript to Rust, adding to it for this example.
Stop the currently running server with Ctrl + c.
Add a DOM feature to Cargo.toml (just add "HtmlInputElement" to the features)
features = ["Document", "Window", "Element", "HtmlInputElement"]Edit file src/lib.rs – full file below:
use wasm_bindgen::prelude::*;
use web_sys::{window, Document, HtmlInputElement};
use wasm_bindgen::JsCast;

#[wasm_bindgen(start)]
pub fn run() -> Result<(), JsValue> {
    let window = window().expect("no global `window` exists");
    let document: Document = window.document().expect("should have a document");

    let element = document
        .get_element_by_id("output")
        .expect("should have #output on the page");

    element.set_inner_html("Hello from Rust!");

    let input = document
        .get_element_by_id("name-input")
        .unwrap()
        .dyn_into::<HtmlInputElement>()?;

    let value = input.value();

    let output = document
        .get_element_by_id("greeting")
        .unwrap();

    output.set_inner_html(&format!("Hello, {}!", value));

    Ok(())
}
We get the value of the input text box and use it to construct a message using the name and set text in another HTML element to that message.
Edit file index.html:
<!DOCTYPE html>
<html>
    <head><meta charset="utf-8"><title>DOM from Rust</title></head>
    <body>
        <h1>Connecting Rust to the DOM</h1>
        <p id="output">Loading...</p>

        <h1>Rust DOM Input</h1>
        <input id="name-input" value="Greg">
        <p id="greeting">Loading...</p>

        <script type="module" src="index.js"></script>
    </body>
</html>
No changes to file index.js.
Build the Wasm Module
wasm-pack build --target webServe and Run in the Browser
Start a local web server
npx serve .You should see the output in the shell window indicating the server has started.
In a new browser tab, open the printed URL: http://localhost:3000, or simply refresh the browser tab we have used for earlier examples.
You should see something like this:

Summary
In this subsection, you:
- Accessed and manipulated DOM elements directly from Rust using
web-sys - Set inner HTML based on Rust logic
- Read values from inputs and updated the DOM — all without writing any JavaScript logic
Rust and WebAssembly together offer an incredibly powerful way to write high-performance, memory-safe code that runs right in the browser — with no plugins, no unsafe scripts, and no compromises on speed.
In this post, you:
- Learned what WebAssembly is and why Rust is a perfect language for targeting it
- Set up a complete Rust+Wasm development environment with
wasm-pack,wasm-bindgen, and supporting tools - Wrote real, browser-ready Rust modules and connected them to JavaScript with ease
- Explored ways to pass data, handle errors, interact with the DOM, and even build full apps from scratch
Whether you’re building high-speed libraries, interactive web apps, or simply experimenting with the next frontier in frontend tech, Rust + WebAssembly gives you the tools to do more — with less overhead and more safety.
The best part? You now have the skills and structure to continue growing — from micro-libraries to complete client-side engines — all powered by Rust, running at near-native speed in the browser.
We hope this introduction to WebAssembly in Rust has been informative and useful. Thanks for stopping by, and come back soon on your journey toward Rust programming mastery.
Leave a Reply