Introduction
To get started with Rust programming, you first need to setup your development environment. In this post we install the tools used in Rust programming, including Rust itself, an IDE (integrated development environment) called VS Code, and a VS Code extension to enable auto-completion, inline error notifications and more.
Installing Rust
To install Rust, open the Rust website in your browser.
You should bookmark this site because it contains a lot of great information on Rust, including learning resources, documentation, events and more.
Click the Install link at the top of the page or just click here.
The preferred way to install Rust is to use rustup.
Rustup is the official tool for installing, managing, and updating the Rust programming language and its toolchains (compiler, standard library, and other essential tools).
It allows you to easily switch between different Rust versions (stable, beta, and nightly) and manage cross-compilation targets.
Note: if at some point you want to uninstall Rust, just execute this command in a Terminal, Cmd or Powershell window:
rustup self uninstall
Installing Rust on Mac / Linux
If you are on a Mac or Linux machine, just run this curl command in a Terminal window:
curl --proto '=https' --tlsv1.2 -sSf https://sh.rustup.rs | shOn Mac and Linux, all Rust related tools are installed to this directory:
~/.cargo/bin
After installation, run this command in a new Terminal window:
rustc –version
If you see something like this then you’re all set:
rustc 1.85.0 (4d91de4e4 2025-02-17)
If you don’t see this, it could be that you need to update your PATH environment variable. How to do this varies depending on what type of shell you are using, so you may need to Google a bit, but this is the command you need to update the PATH environment variable on Mac and Linux:
export PATH=”~/.cargo/bin:$PATH”
Installing Rust on Windows
If you are on Windows you should see something like this:

You probably want to click to install the 64-BIT version, unless you are on a 32-BIT machine.
A shell window may open with a message indicating that you do not have prerequisites, such as a linker and Windows API libraries.
These are typically the Microsoft C++ Build Tools, which can be installed separately or as part of Visual Studio.
Installing those prerequisites will be necessary if you end up creating significant Rust programs, because some advanced features require those prerequisites.
But if you just want to give Rust a try on Windows, and don’t want to install all those prerequisites, then in that shell window select the option that says something like this:
Don’t install the prerequisites
If you do decide to install the prerequisites, and if it gives you a “Quick install” option, I suggest selecting that. Note that it won’t be that quick.
After you install those prerequisites, restart your machine, and then double-click the rust install file that was downloaded when you visited https://www.rust-lang.org/tools/install.
After installation, run this command in a new Cmd or Powershell window:
rustc –version
If you see something like this then you’re all set:
rustc 1.85.0 (4d91de4e4 2025-02-17)
If you don’t see this, it could be that you need to update your PATH environment variable. First verify that this directory exists in your users folder. You can open a File Explorer window and navigate to this path.
c:\Users\YOUR_USER_NAME\.cargo\bin
If that directory exists, copy the path to your .cargo\bin directory and add it to your PATH system environment variable. How you do this might vary depending on your version of Windows so do a Google search for instructions on updating your PATH.
Install the IDE (Integrated Development Environment)
Now that you have Rust installed, we’ll install an IDE (Integrated Development Environment). It’s an application where you will write your Rust code as you develop applications.
You could just use your favorite text editor as long as it doesn’t add formatting, such as formatted quotes, like MS Word, but using an IDE is a good idea as it can give you auto-completion, error messages and much more.
We’ll install VS Code as it is the most popular IDE in use by Rust developers. Click here to go to the VS Code website:
https://code.visualstudio.com/download
Follow the instructions for downloading and installing VS Code for your operating system.
When installation has finished, go ahead and launch VS Code. In the left-hand sidebar click the extensions icon:

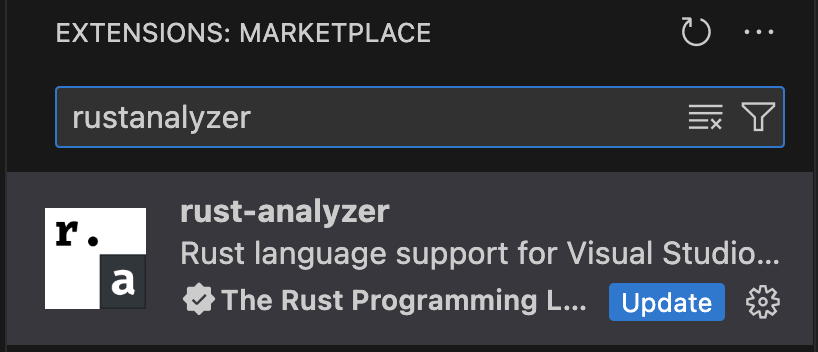
Now type rustanalyzer (with a “z”) and click Install for the extension you see here:

Note: I already have this extension installed so it says Update for me, but for you it should say Install.
Create a New Rust Package
We’ll create a new Rust package using the cargo tool that was installed when you installed Rust.
cargo is the package manager and build system for Rust. It creates new package, build and runs them, manages dependencies, runs tests, builds documentation, and more.
Future posts will talk more about the cargo tool, for now we’ll use it to create a new package, and then build and run our package.
I suggest creating a new directory somewhere to hold your Rust applications (packages). And then within that directory you might want to add an new directory bytemagma where you will create packages when viewing our posts teaching Rust.
Anyway, open a new Terminal window (Cmd or Powershell window on Windows) and cd to that folder you created. Then execute this command:
cargo new hello_world
By convention you should use lowercase snake case (all lowercase, words separated by underscores) for Rust package names.
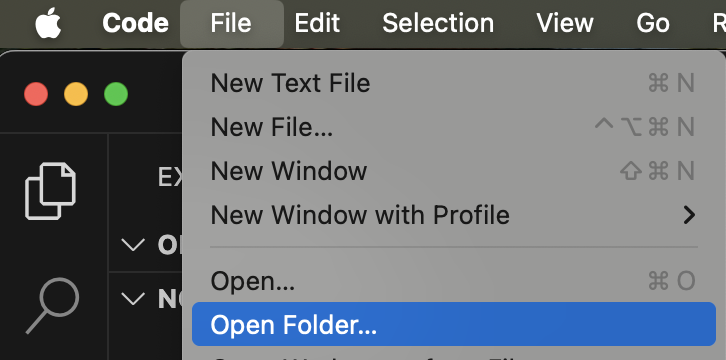
Then cd into that directory in your shell window, and also open that directory in VS Code:

If you get a message in VS Code asking if you trust this folder, click Yes.
In VS Code, in the left-hand pane, click the top-most icon to view the folders and files in the package, and click the file main.rs. You should see this code, which was created automatically for you when you created the package:
fn main() {
    println!("Hello, world!");
}
Note that each Rust package will have a main.rs file which is the entry point to the package. Inside that file you will have a main() function, the code entry point for your package.
Future posts will go into functions and many other aspects of Rust coding in great detail, as you move toward Rust mastery. For now, understand that this main() function is called when we run the package.
In our package, main() simply calls the println!() macro, passing the string literal “Hello, world!”. Future posts will cover macros in detail.
Back in the Terminal window, verify that you have cd into the hello_world directory. Then execute this command:
cargo buildThis tells cargo to build our package. Now execute this command to actually run our package:
cargo run
Our package prints the message Hello, world! to the screen. We have a working Rust package!
If you ran into any issues installing Rust, and then creating and running this first package, please review the steps outlined above.
We hope you have enjoyed this post on setting up your Rust development environment. Future posts will begin your journey into mastering the various aspects of Rust programming that will allow you unlock its power, and have a great deal of fun!
Thank you so much for stopping by!
Leave a Reply